Get in touch with Tengyang Company

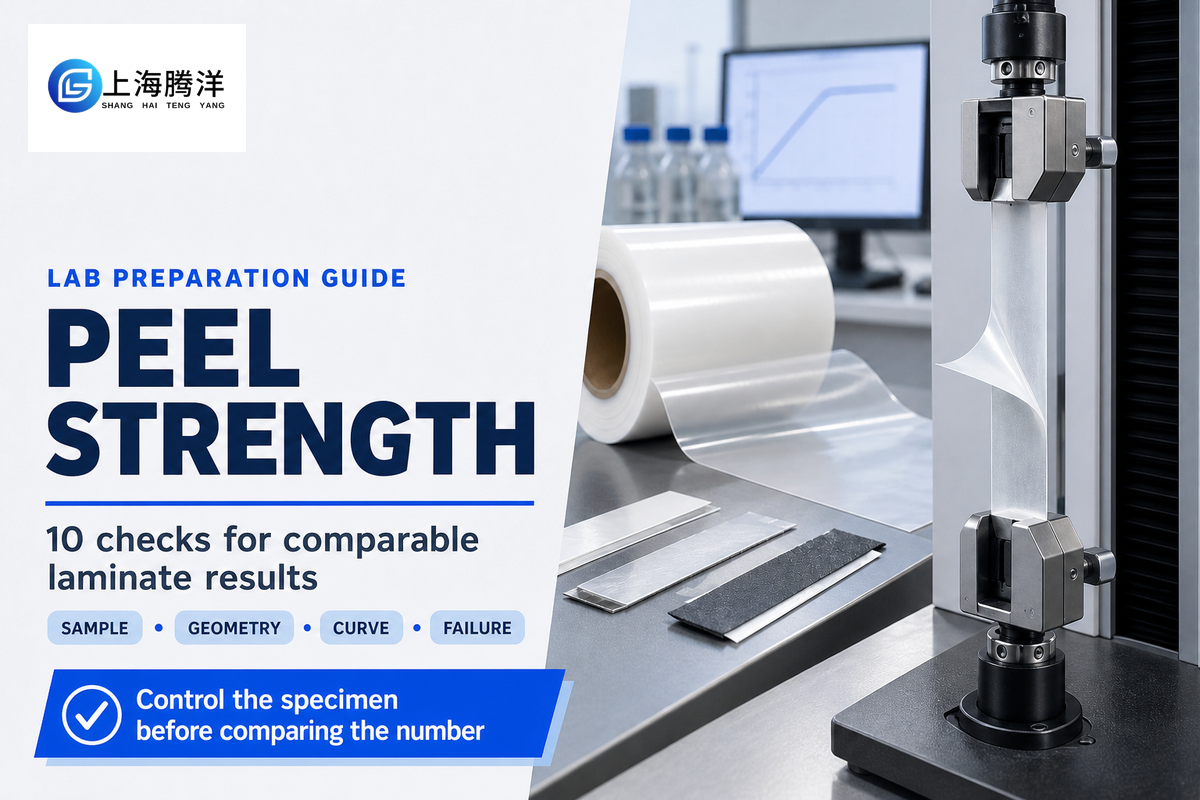
Peel strength refers to resistance to separation under a defined test procedure, so results are comparable only when sample preparation and test conditions are controlled. Agree the laminate construction, sampling direction, geometry, conditioning and reporting rules before cutting strips or sending samples to a laboratory.
By Aurora · Updated October 2026
Quick Specs: preparation decisions
- Test object: the identified bonded laminate and intended separation interface.
- Method: the agreed ASTM or ISO edition, geometry and approved deviations.
- Dimensions and count: taken from that method and the sampling plan.
- Release to testing: traceable specimens, agreed conditions and a named deviation owner.
- Keep lot, roll position and machine or cross direction attached to every strip.
- Separate adhesive cure history from later conditioning and transport.
- Record support, backing modifications and failure location alongside the force curve.
- Use the comparison checklist and filled handoff example below before shipment.
Peel Strength Comparability Starts Before the Test Frame
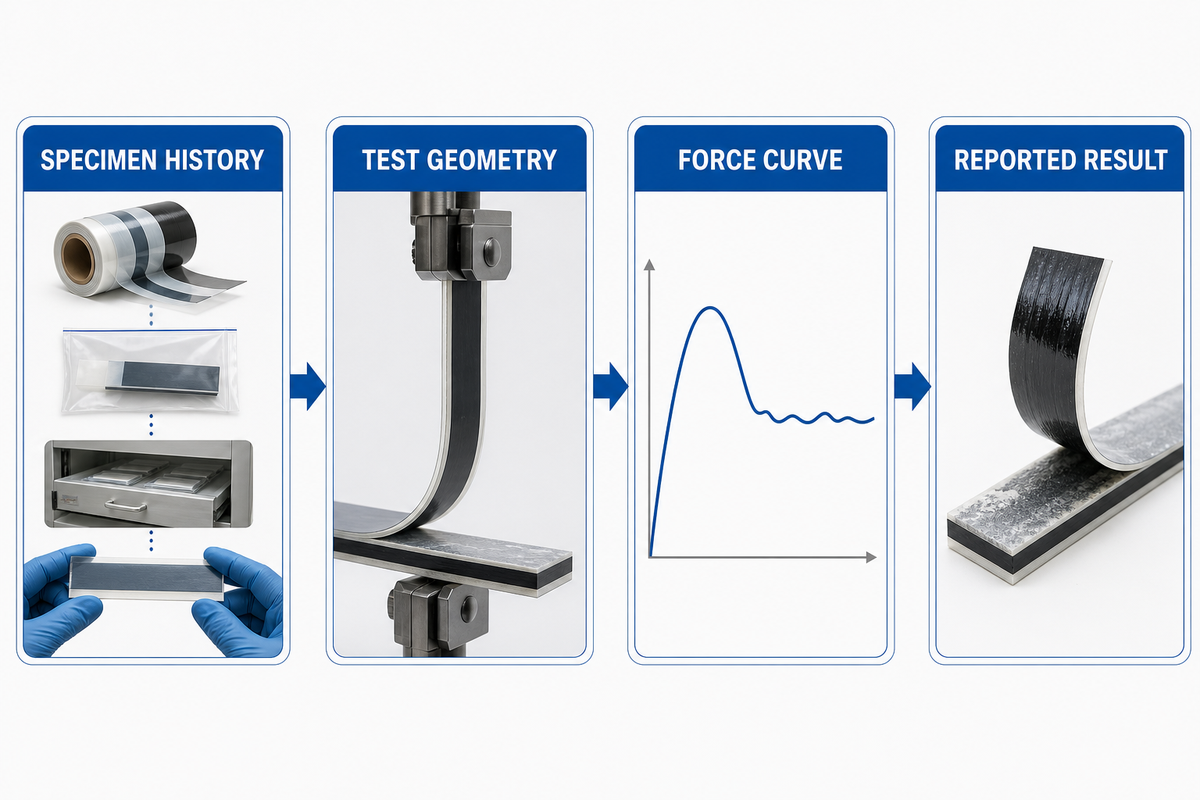
A stronger-looking result can come from a different test specimen rather than greater strength of the adhesive bond. Preparation dictates what the test machine separates: the intended interface, an edge that has delaminated, a stretched peel arm, or another layer in the construction.
What is the purpose of a peel test?
A peel test measures the resistance of a bonded system to separation in a specified geometry. It provides a basis for comparison of constructions or process conditions when preparation and measurement rules are uniform. The result describes that test system; it doesn’t isolate the strength of an adhesive from all contributions made by the substrates.
Imperial College London’s peel-test guidance explains why peel-arm deformation matters when deriving adhesive fracture energy. Reporting force per unit width of the bond can’t remove those effects. The mechanical properties of the peel arms remain part of the test system. A validated mechanical analysis may support a comparison across geometries; a shared unit can’t establish it.
This guide focuses on the sample handoff. More complete information on peel strength, peel force, adhesive strength, adhesion strength and bond strength is available in the peel strength geometry and reporting guide.
Freeze the Adhesive Test Contract Before You Cut
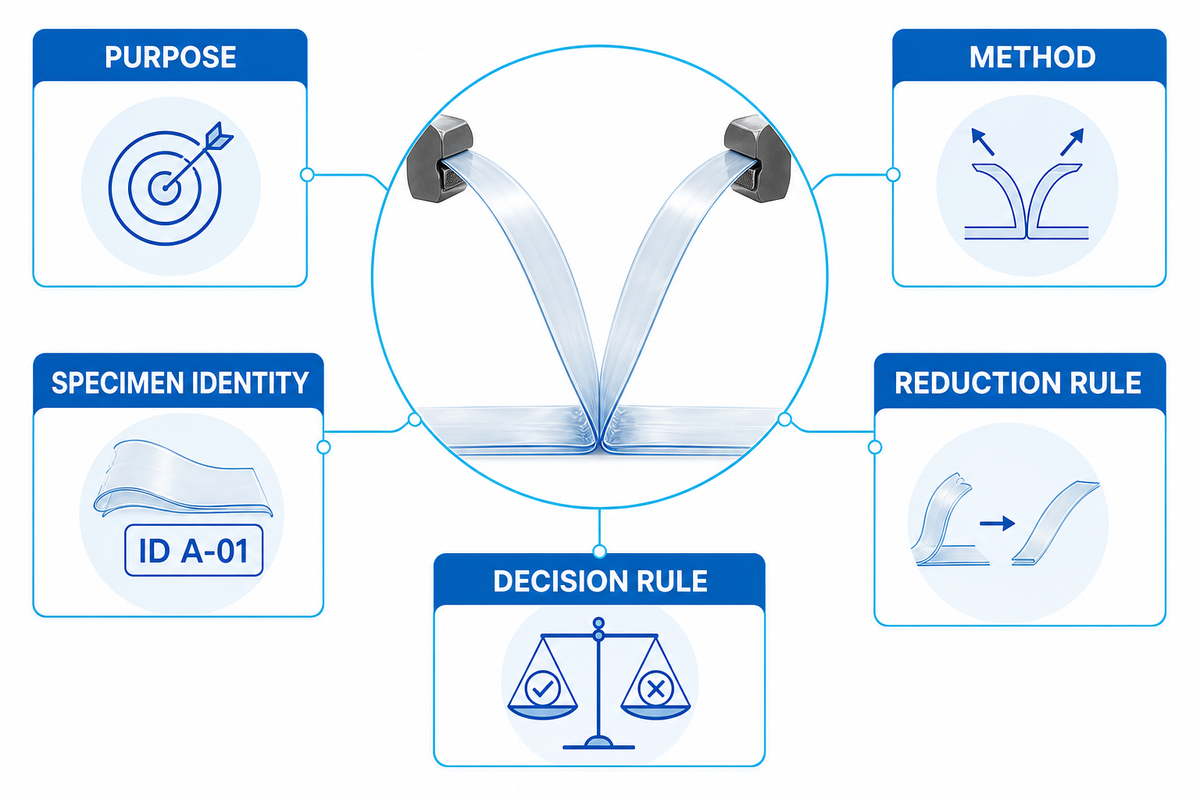
Start with the decision: compare adhesive grades, examine a process change, or evaluate an exposed laminate against an agreed requirement. Name the two materials being bonded together and the interface you wish to separate. “Film to fabric” omits a lot of information.
Which type of test is ASTM D903?
ASTM D903 is a standard test method for peel (or stripping strength) of adhesive bonds under specified preparation and testing conditions. Its public scope describes a comparative measurement. Before selecting it, agree the specimen construction and apparatus with the laboratory, and use the specified edition to set the detailed procedure.
The public scope of the ASTM D903-98(2025) does not replace the complete method. Record the edition on the request: a familiar name of a method without its conditions does not indicate if reports are comparable.
- Identify the adhesive grade, form, batch and bond line, plus each substrate’s face, finish and coating.
- Attach the bonding temperature, pressure, dwell and cooling record; add cure history where relevant.
- Agree specimen dimensions, replicate count, environment, rate and result metric.
- Name who approves deviations and whether affected results remain usable for the original decision.
Set an acceptance criterion in the product qualification plan. An acrylic grade name alone does not describe the substrates or prove strong adhesion in the proposed construction. A standard test establishes a measurement procedure, not a universal pass/fail level for different adhesives or end use.
Build the Direction-Lot-Condition Triangle
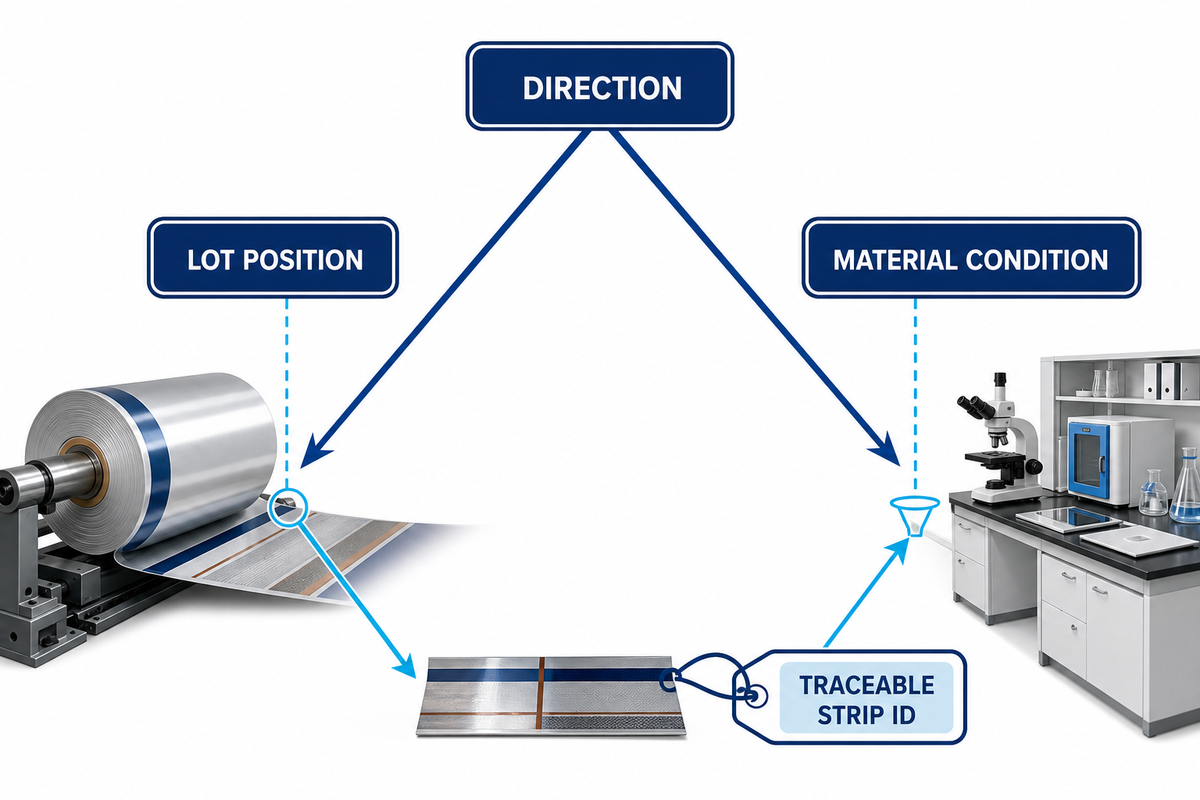
Use the Direction-Lot-Condition Triangle as a sampling reminder. Every result should retain its orientation, material origin and exposure history. This is an organizational tool, not a statistical sampling standard. It supports repeatable identification, while the sampling plan determines which variation is examined. Several neighboring strips don’t automatically represent variation across several rolls.
Mark machine direction and transverse direction before cutting. Keep the roll position and bonded face legible after separation.
A 2022 study of photovoltaic backsheet films showed that directional film mechanics influenced peel behavior, and evaluated 25 µm and 45 µm films. Their materials showcase how important orientation is; however, they don’t necessarily take the place of testing your textile laminate.
Allocate specimens across the lots, positions, directions and exposure groups pertinent to the decision under consideration. Reserve specimens with the laboratory and agree on labeling at preparation. Retain the original failed or excluded specimen record when a reserve is used.
State limitations when only one roll or orientation is available. The buyer is free to decide between a restricted comparison and additional sampling prior to acceptance of a broad claim.
Cut Strips and Form the Peel Starter Without Adding Damage
How To Do a Peel Test?
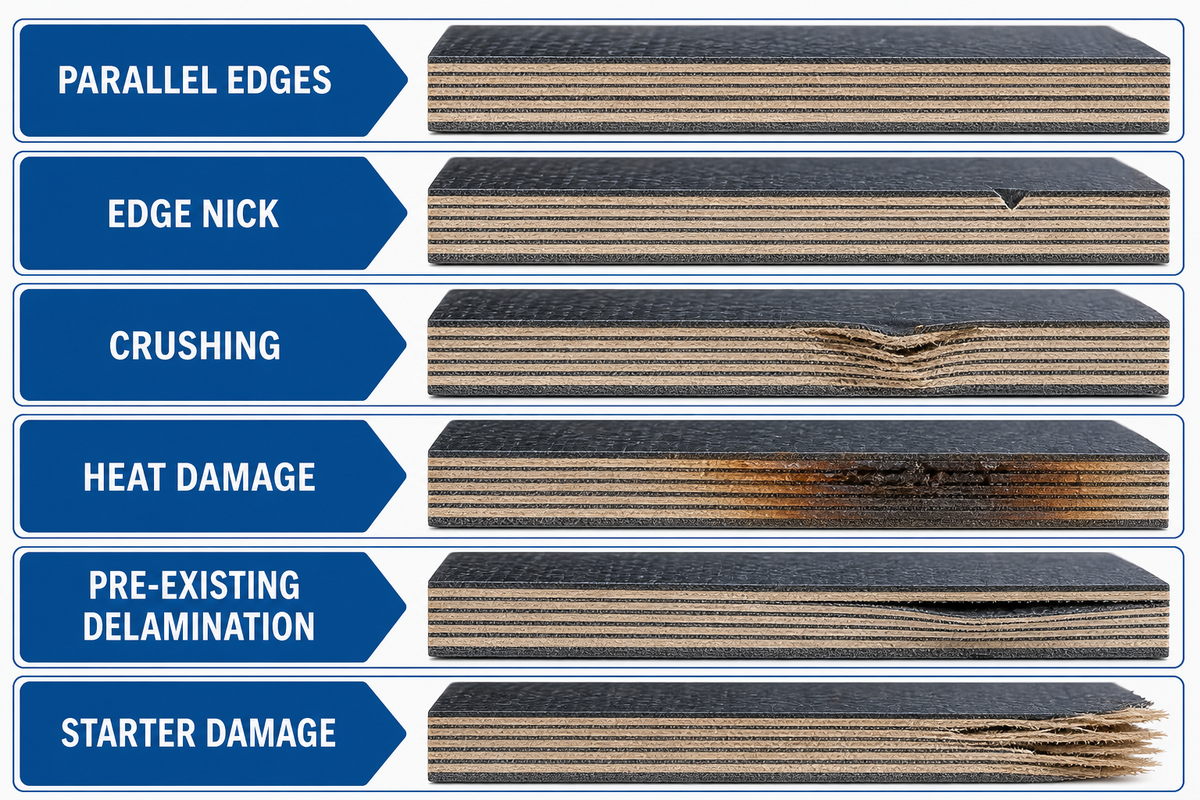
To determine the peel strength of a flexible laminate, prepare traceable specimens to the agreed method with controlled cutting and an identified separation interface. Measure the actual width of the strip, and inspect both edges. Using standard practice, prepare a starter. Don’t allow the starter to damage the evaluated bond. Record any changes from the standard practice. A change from standard practice can alter the meaning of the result.
Inspect edge uniformity and record defects before testing. A defect can cause a strip to fail at an unintended interface. Photograph suspect areas and ask the method owner whether to replace or test them separately. Don’t return a damaged specimen to the same comparison and trim it into a new width.
A 2023 CFRP peel study, section 3.2.4, compared 10 mm and 20 mm specimens in its fully cured epoxy setup. The mean results did not show a statistically significant difference, while the narrower set had greater scatter. Checking width and repeatability should be addressed; this study doesn’t establish 20 mm as the correct width for every laminate.
Describe how the unbonded starter is made and where in the evaluated region that length belongs. A piece of tape as reinforcement, while helpful for a particular construction, changes the specimen. Obtain the laboratory’s agreement and describe the material, attachment and failure interface.
Control Conditioning, Storage and Transport
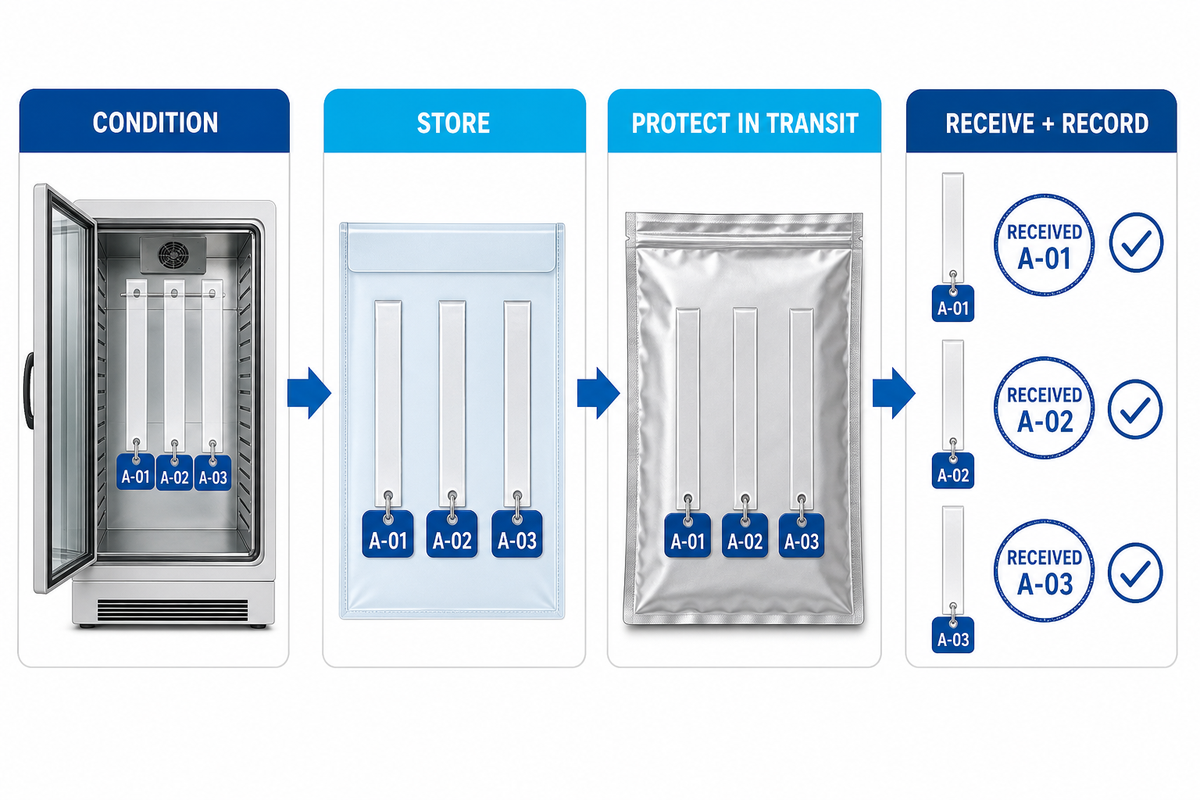
Keep three histories separate: Preparation prior to bonding, cure or cooling after bonding, and conditioning prior to testing. Combining them into “stored at room temperature” results in the laboratory failing to distinguish an uncompleted bond from environmental conditions. Keep the actual records with the test request.
In Amy Peterson’s analysis of common problems with the adhesive test, specimen preparation and cure are noted as practical limits to the utility of the results. Record the specified duration and environment at each relevant step, with the actual times available from production and the lab.
The CFRP study cited above conditioned its specimens at 23 ± 2 °C and 50 ± 5% relative humidity for at least 48 hours. Those are that study’s conditions, not a default recipe for hot melt film, pressure-sensitive adhesives or every polymer substrate.
- Keep identification with the samples during packing and receipt.
- Record a known heat, moisture or storage excursion.
- Ask whether receipt conditioning can resolve the excursion or whether the material history prevents the planned comparison.
Retain rate and temperature in the test plan when they affect the application. The viscoelasticity guide provides context on time and temperature, in general.
Match T-Peel and Supported Peel Geometry to the Laminate
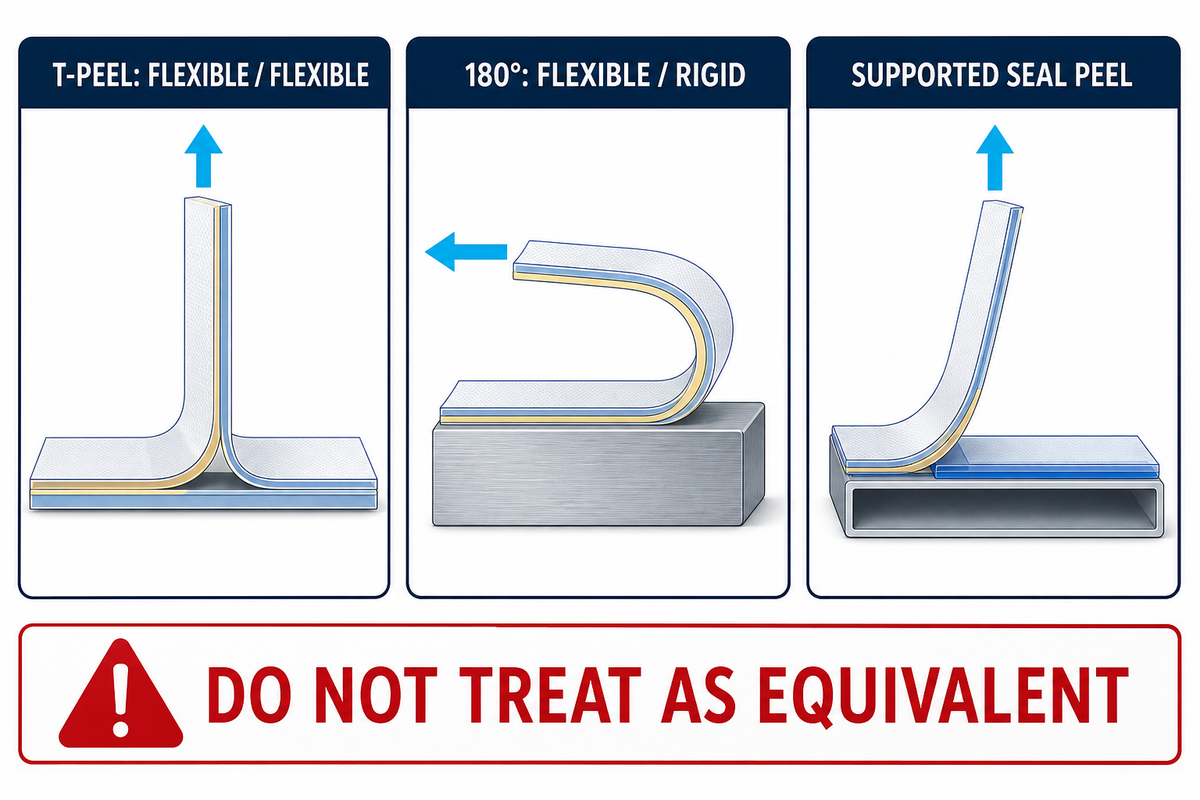
Select geometry from the bonded material and intended measurement. ASTM D1876-08(2023) addresses relative T-peel resistance between flexible adherends, while ISO 8510-2:2006 addresses 180° peeling of a flexible adherend from a rigid adherend. These types of peel tests should not share an acceptance limit without a justified comparison basis.
“This test procedure does not provide design information.”
For Vertical T-peel, explain how the unpeeled tail is supported. Padhye and colleagues’ study of gravity in T-peel testing shows how weight-induced asymmetry can impact thin and flexible specimens. Record the test fixture, free tail and alignment rather than assuming that two grips settle the geometry. Where a controlled angle is part of the method, show how the fixture maintains it.
Keep seal testing distinct from an interlayer laminate comparison. ASTM F88/F88M-23 concerns seal strength in flexible barrier materials and distinguishes unsupported, 90° supported and 180° supported techniques. A convenient seal fixture does not, by itself, validate a different adhesive testing task.
Agree Test Rate and Force-Curve Reduction
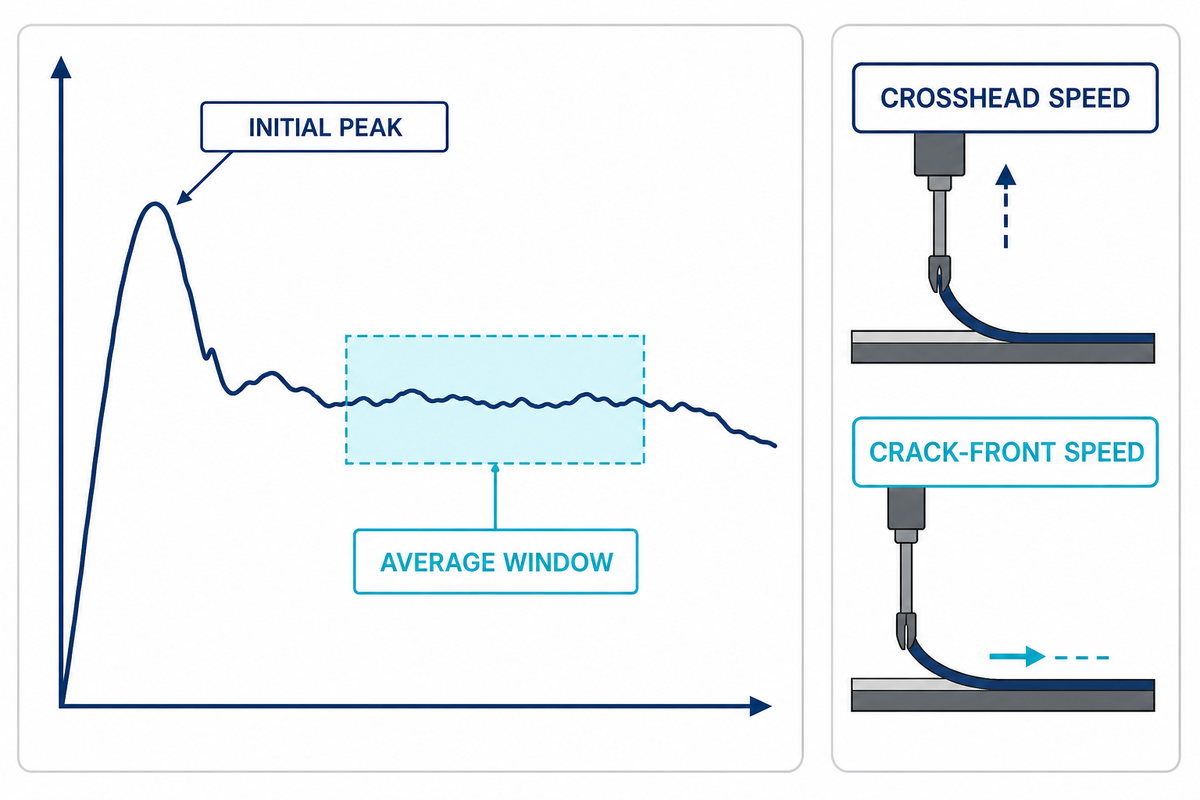
Ask the lab to record the force curve and identify the interval used for the reported average peel result. A starting peak, maximum load and average load describe different parts of the record. Changing the interval after examining results can change the ranking.
ASTM D1876’s public description evaluates separation after the initial peak. Identify the test method used and its reduction rule, including treatment of slip, arm tearing and interrupted separation. Leave excluded regions in the raw record, if any, with their rationale.
Distinguish crosshead speed from crack-front speed when documenting rate: in the cited T-peel fixture, the support mechanism moved at one-half of the cross-head velocity to keep the unpeeled portion aligned. Specify what the testing machines control and what the reported displacement represents. Force capacity sufficient to avoid overload is only one equipment question; suitable measurement resolution and grips also matter.
Request the force unit, measured width of the bond line and normalized reporting unit. Indicate whether the width is in millimeters or inches. Values in N/mm and pounds per inch need consistent units, but conversion does not make different geometry, support or averaging rules equivalent. The bond test report guide separates the reported quantity from the acceptance decision.
Pair the Force Curve With the Actual Failure Interface
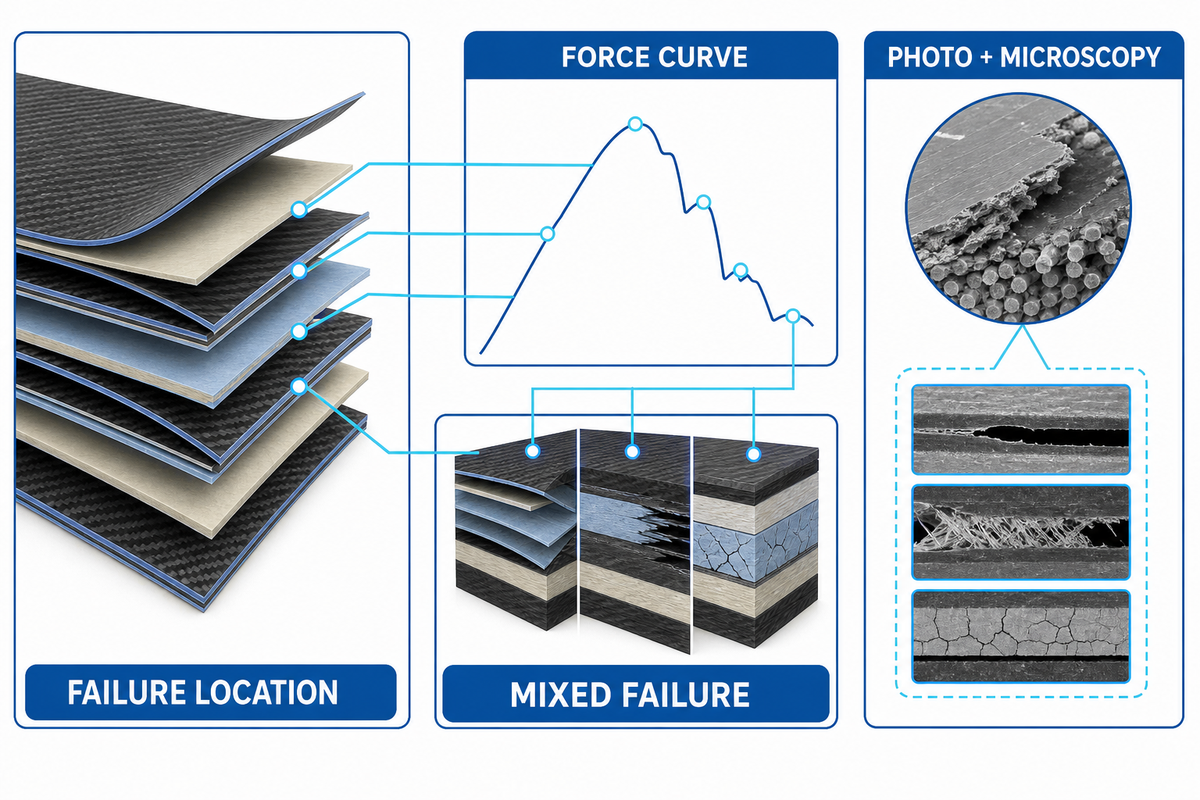
Link photographs and observations to specimen IDs and curve regions. Distinguish separation at the intended bond interface from cohesive adhesive damage, substrate tearing, coating separation or failure of added backing. A large force at the wrong interface doesn’t prove the intended interfacial adhesion. A setup used to measure the adhesive joint must still identify which layer actually separated.
There may be some uncertainties in the visual assessment. A 2015 composite and aluminium peel study showed limits to visual assessments of failure and used microscopy for selective assessments. In the absence of clear evidence of failure path, note uncertainty and request follow up examinations.
Do
- Link each photograph to its specimen.
- Mark where failure mode changes.
- Retain ambiguous surfaces for review.
Don’t
- Replace the raw curve with one selected number.
- Call every exposed surface adhesive failure.
- Discard an awkward result without a recorded reason.
When evidence of failure and the supplier’s conclusion don’t agree, refer to the adhesive test interpretation checklist.
Use the 10-Check Peel Comparability Chain
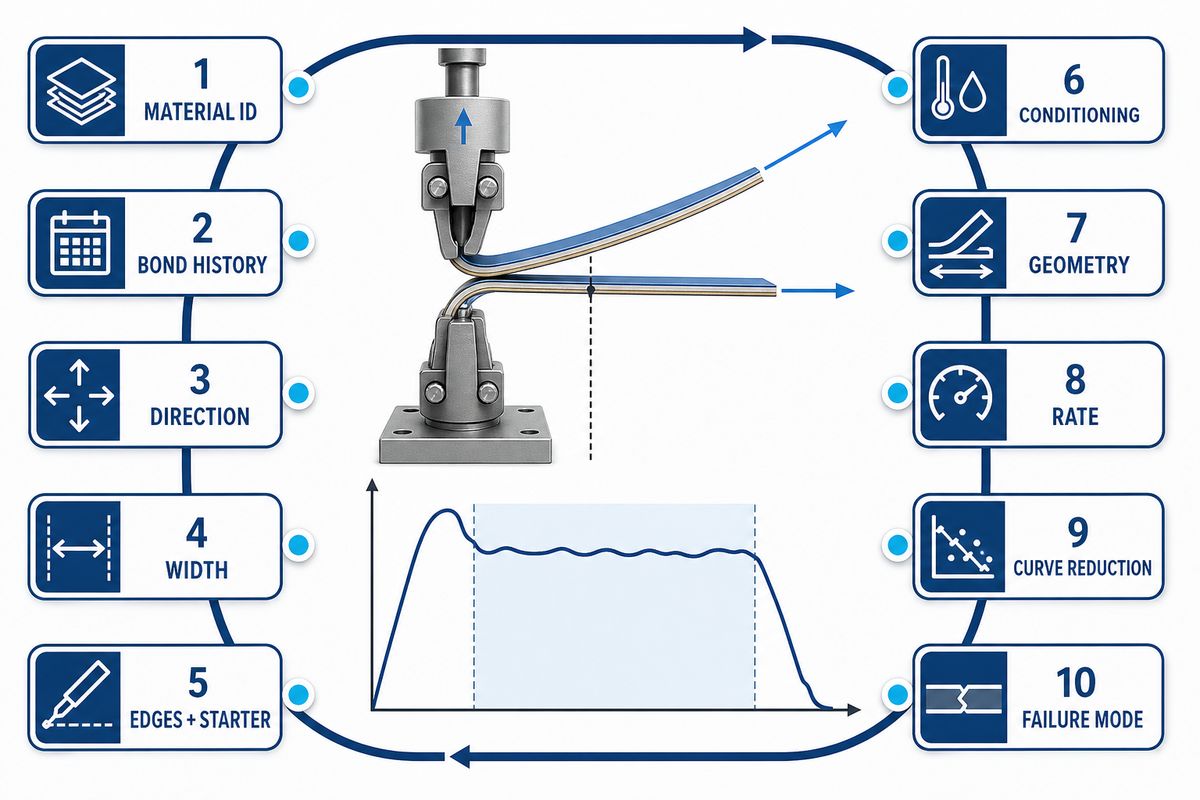
Use this checklist before a shipment and upon receiving a supplier’s report. These are possible discrepancies, not measured client results. “Hold” means resolve that comparison first; it does not mean the material has failed qualification. Assign the unresolved case to the person in the best position to provide evidence.
| Check | Example discrepancy | Evidence and owner | Next decision |
|---|---|---|---|
| 1. Construction | One report includes a coating; the other omits it. | Layer record; supplier. | Hold the material ranking until construction is identified. |
| 2. Lot | A retained production roll faces an unlabelled sample. | Roll-to-lot record; production. | Recover identity or restrict the conclusion. |
| 3. Direction | Machine direction faces transverse direction. | Cutting map; preparer. | Retest matching directions unless comparison is justified. |
| 4. Width | 10 mm strips face 20 mm strips. | Measured widths and method; laboratory. | Check width suitability and validation before ranking. |
| 5. Edges and starter | A nick reaches the evaluated region. | Inspection photo; preparer and laboratory. | Agree replacement or separate treatment; retain the defect record. |
| 6. Cure and conditioning | Only one report records the bonding-to-test interval. | Time and environment record; production and laboratory. | Hold until histories can be compared. |
| 7. Geometry and support | One tail is supported; the other hangs freely. | Fixture photo and setup; laboratory. | Assess comparability or repeat with agreed support. |
| 8. Rate | Only one report names crosshead speed. | Machine method file; laboratory. | Recover the controlled rate before accepting the comparison. |
| 9. Reduction | An initial peak faces an interval average. | Raw curves and interval; laboratory. | Reprocess data only if the agreed method permits it. |
| 10. Failure path | One specimen tears; another separates at the bond line. | ID-linked surfaces and curve; qualification owner. | Report different paths; do not call the higher value better adhesion. |
The chain organizes controls drawn from the cited methods and research. Adherence to the agreed preparation procedure matters more than choosing the most favorable curve. This isn’t a validated scoring system. Take action when relevant fields match or the responsible lab has documented why an identified difference is acceptable.
Send a Complete Lab Handoff Pack
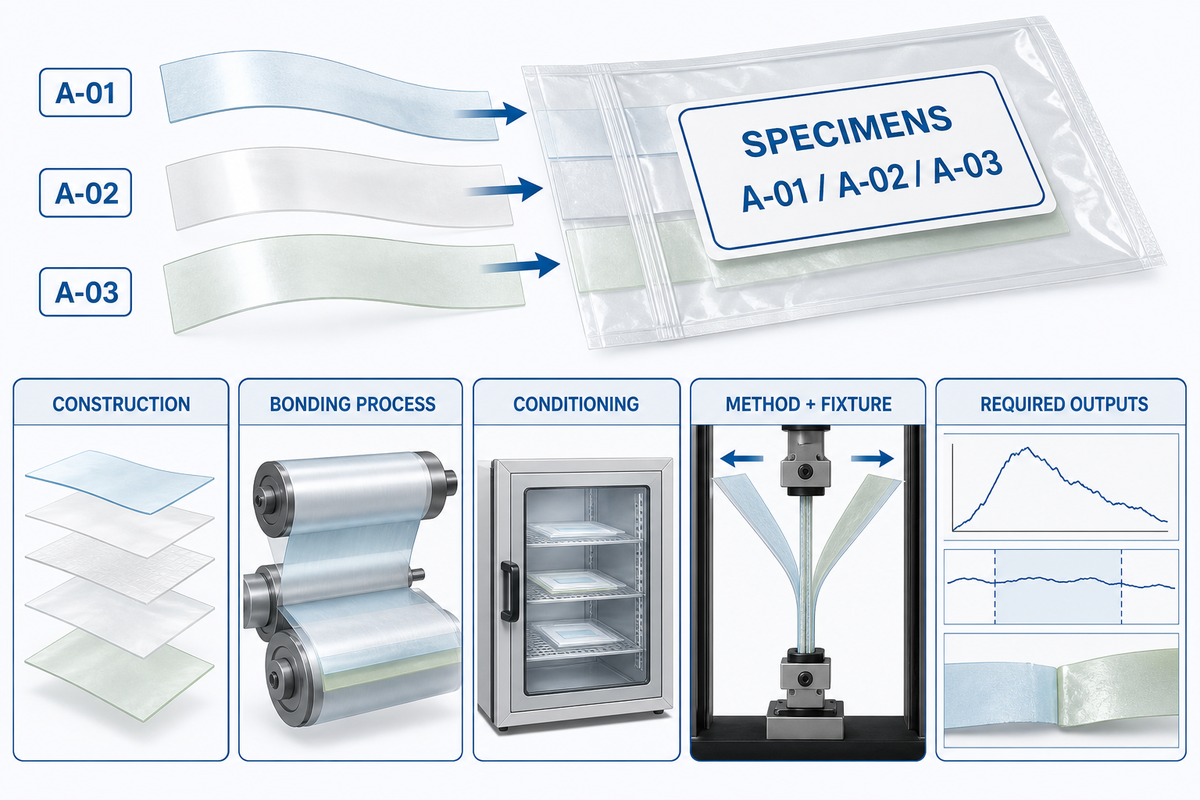
Send the request, cutting map, preparation history and sample identifiers together. This filled example assigns missing evidence instead of leaving an empty checklist. Identifiers in this document are illustrative and don’t represent a result or a prescribed value.
| Field | Example entry or evidence gap | Owner and release action |
|---|---|---|
| Question | Compare retained material before and after agreed wash exposure. | Buyer: approve comparison and acceptance criterion. |
| Construction | Film-to-fabric laminate; finish absent from label. | Supplier: attach layer and finish record before cutting. |
| Lot and position | Illustrative lot L-A, roll R-A, mapped centre position. | Production: attach cutting map and confirm traceability. |
| Direction | Group MD-A along machine direction; cross direction untested. | Buyer: accept the limit or request another group. |
| Bonding history | Press-cycle record attached; cooling history missing. | Production: recover cooling record or declare the gap. |
| Method and geometry | T-peel proposed because both adherends are flexible. | Laboratory: confirm suitability, edition, grips and tail support. |
| Dimensions and count | No dimensions released until method agreement. | Laboratory: issue cutting and replicate requirements. |
| Exposure | Washing requested; drying procedure and cycle count missing. | Buyer: define complete exposure before sample processing. |
| Conditioning and receipt | Shipment history travels with sample IDs. | Laboratory: log receipt, deviations and conditioning. |
| Results | Individual curves, width, reduction interval and failure images requested. | Laboratory: preserve exclusions and supply linked records. |
| Reserves | Group MD-R linked to the same cutting map. | Buyer and laboratory: agree replacement reasons before testing. |
| Disposition | Comparison held until missing preparation and exposure fields are resolved. | Named qualification owner: release or revise request. |
The bond report request checklist builds a plain-text request that records the construction, materials, process, testing and decision context needed to review an adhesive-bond report. This provides the lab with a good idea of what they need to measure and what uncertainty the buyer is concerned with.
Connect the Evidence to the Next Supplier Trial
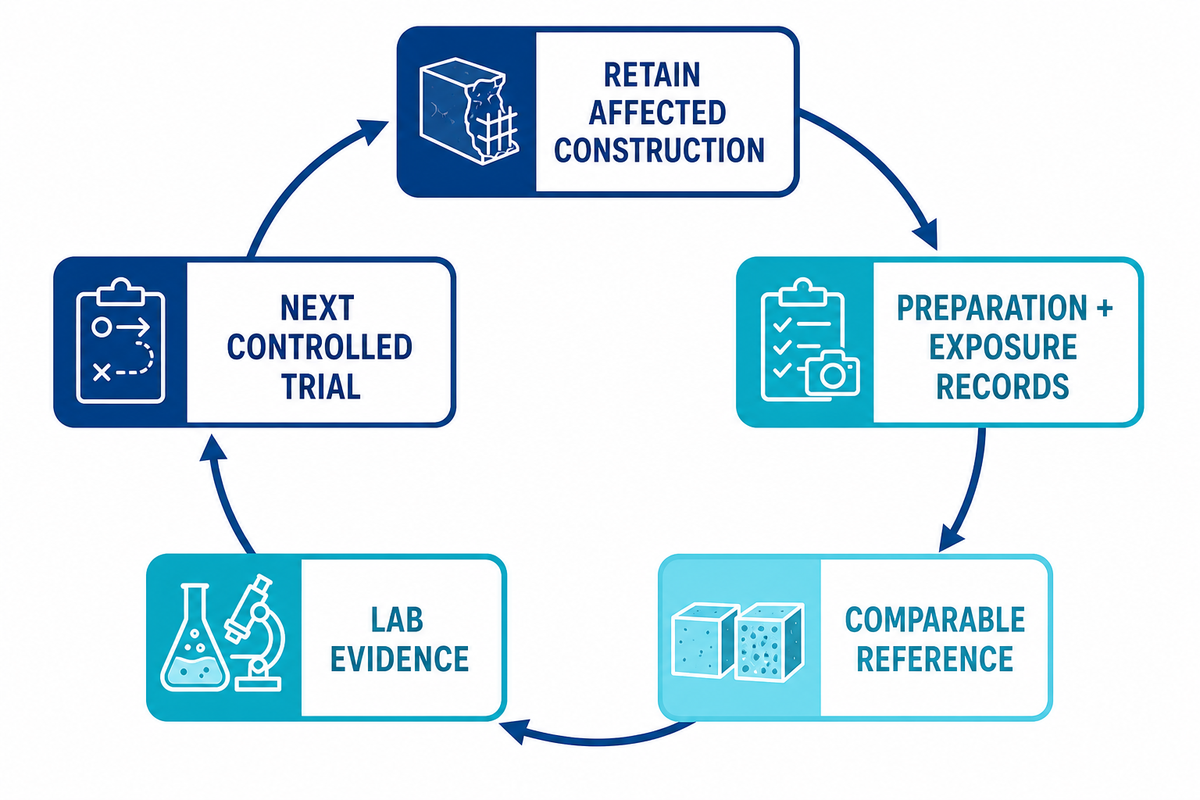
Suppose a washable laminate separates after use: retain the affected construction and compare its preparation and exposure records with the reference; an unwashed result on another fabric cannot answer why that construction separated.
If the agreed exposure uses ISO 6330:2021, identify washing and drying procedures together, plus the chosen cycle count. The Standard addresses textile washing and drying procedures; it does not offer a universally accepted peel-retention threshold. Keep exposed and unexposed groups traceable to preparation.
The next variable to be determined from missing evidence is preparation, bonding process, adhesive grade or exposure adequacy. If a porous fabric finish changed, identify it before assigning the difference to the adhesive. Use a bonding trial matrix to clarify proposed changes and response measurements.
Key takeaway
A useful peel comparison preserves specimen identity, preparation and failure evidence. Resolve a changed test condition before attributing a changed number to the adhesive.
Considering Tengyang? Provide the laminate construction, adhesive form, bonding conditions and the comparison you wish to make. Give the latest copy of the peel report and state any known preparation gaps, so the discussion can be based on the same evidence.
Frequently Asked Questions
What does peel strength mean?
Peel strength describes resistance to separating a bonded system under a defined test procedure.
The reported force is often normalized by specimen width, but the result still depends on geometry, preparation, test rate and the materials being separated. Keep those details with the value. If the substrate tears or a coating detaches, record that event rather than treating the measurement as the adhesive’s isolated strength or a universal material property.
What is the strongest type of adhesive?
There is no single strongest adhesive across all substrates, loads and exposure conditions.
A peel result cannot rank every adhesive for tensile strength, shear strength, toughness or thermal stability. Start with the actual construction and failure condition the product must withstand. Compare candidate grades using an agreed test plan and relevant exposure. A supplier’s largest published value does not establish adhesion properties for your application when the method, specimen or failure path differs.
What is a peel-off strength test?
A peel-off strength test pulls a flexible bonded layer away while recording separation force.
The informal name does not identify a complete peel adhesion procedure. Ask which standard, geometry and specimen preparation apply, how the free material is supported, and which part of the force record becomes the reported result. Adhesive tapes, flexible laminates and packaging seals can require different arrangements, so the name alone is insufficient for commissioning a comparable strength test.
How many specimens and reserve strips should I send?
The governing method and sampling plan determine specimen count and reserve material.
Tell the laboratory which lots, roll positions, directions and exposure groups the request represents. Neighboring strips may describe local repeatability while leaving between-roll variation untested. Ask how much material the lab needs to check cutting, grips and starter suitability before preparing the final set. Identify reserves when cutting the original samples and preserve their preparation history. Agree who may authorize replacement, which defects justify it and where the original observation remains recorded. Sending more unlabelled strips does not repair an incomplete sampling plan. If material is limited, obtain a narrower written scope so the report describes the comparison performed rather than the larger one originally requested.
Should strips be cut in both machine and cross directions?
Both directions are needed when the method, qualification plan or relevant material behavior requires them.
Label each orientation before cutting and disclose any direction left untested. One orientation cannot establish the other orientation’s result.
Is peel strength the same as tear strength?
Peel strength concerns bonded separation; tear strength concerns propagation through a material.
If a peel arm tears, retain that observation. It limits what the result establishes about the intended bond interface.
References & Sources
This preparation guide uses linked public ASTM and ISO scopes, published peel studies and laboratory guidance. Public scopes establish method boundaries; exact specimen requirements and settings come from the governing full method and agreed test plan. The two checklists are editorial aids, and the handoff example is hypothetical.
- Imperial College London’s peel-test guidance
- ASTM D903-98(2025) public scope
- 2022 study of photovoltaic backsheet films
- 2023 CFRP peel study, section 3.2.4
- Amy Peterson’s discussion of common adhesive-test problems
- ASTM D1876-08(2023)
- ISO 8510-2:2006
- ISO 11339:2022, T-peel test public scope
- Padhye and colleagues’ study of gravity in T-peel testing
- ASTM F88/F88M-23
- 2015 composite and aluminium peel study
- ISO 6330:2021